Last time, I mentioned that we use a pipeline to manage updates to the techorrect.com website. The pipeline is triggered on each commit to master, and begins running automated tests on the code changes. Since the techorrect.com website is simple and only consists of static pages, the tests we’ve chosen to run only validate the HTML and check for broken links. To do this, we are using the awesome html-proofer gem. Once these tests have passed, the pipeline uploads the new/updated static pages to our AWS S3 bucket. By automating tests and deployment, we can focus on creating new content.
Since our website’s source code repository is hosted on Bitbucket, we use Bitbucket pipelines for this website. Like many other CI/CD platforms, creating a pipeline in Bitbucket consists of configuring a YAML file (bitbucket-pipelines.yml) and adding it to the root of your repository. This has the effect of version controlling your pipelines too! Each pipeline then can have one or more steps (up to 10), where each step creates a new container that you specify. Within each step, you define commands to run on the container.
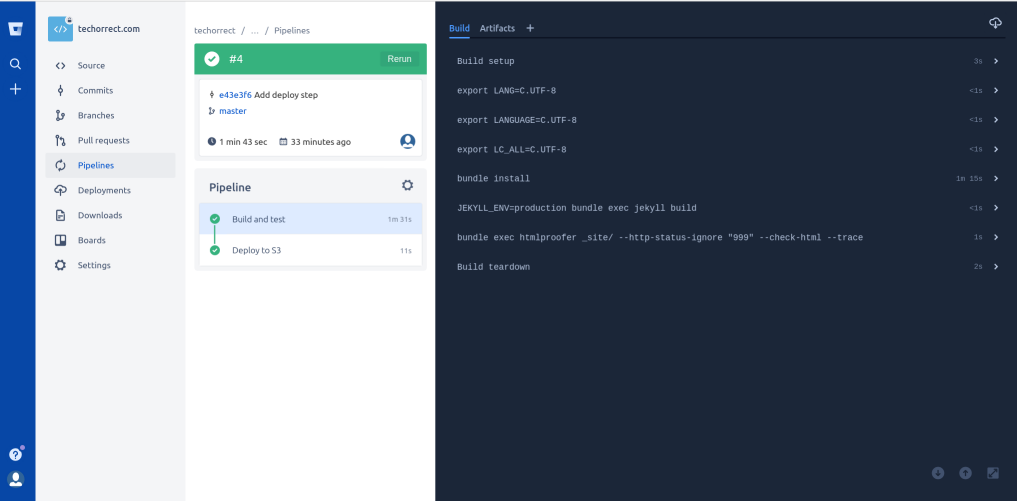
The screenshot below shows our pipeline. It has two steps - “Build and test” and “Deploy to S3”. The first step uses a ruby image that builds the static pages and runs the html-proofer tests. The second step uses the mesosphere/aws-cli image which pushes the new files to our AWS S3 bucket. The aws-cli image checks for AWS credentials in some environment variables, so we created a dedicated IAM user for this pipeline, and stored the credentials using Bitbucket’s secured variables.
If you would like to learn more about setting up similar pipelines and processes for your own software development projects, we’d love to chat - feel free to contact us at info@techorrect.com.
Comments (0 responses)